
Summer is the perfect time for paper crafts; what could be an ideal way to honor the season than creating a paper flower crown? Make a statement with a DIY paper flower crown! Perfect for any summer occasion, from festivals to picnics in the park.
Related Articles
Materials:
- Colored paper
- Scissors
- Glue
- Green pipe cleaners
- Pencil
- Ruler
Instructions:
.jpg)
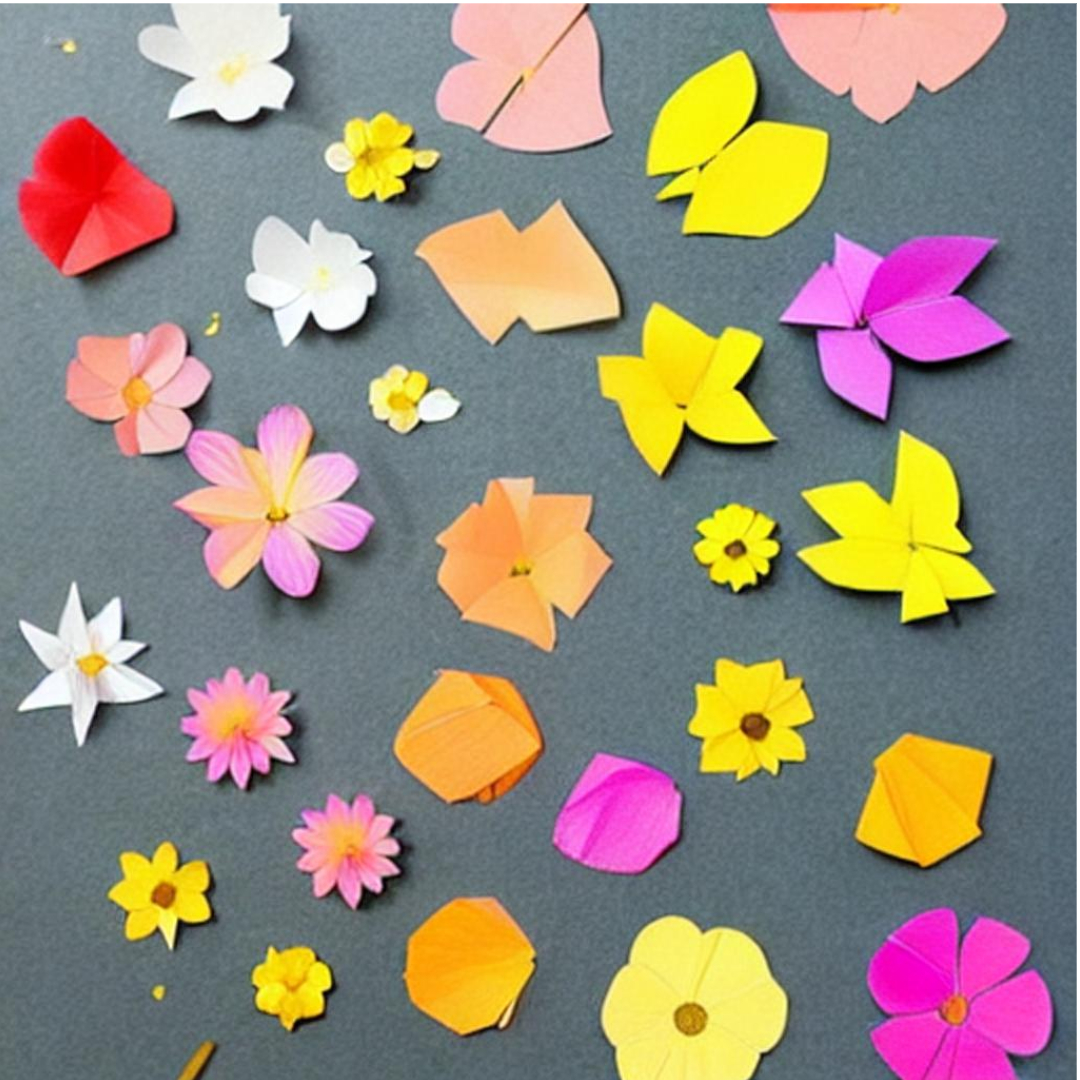
Step 1: Draw and cut out flower petal shapes from colored paper, such as daisies, roses, or sunflowers.
Table of Contents - Whats inside this article
.jpg)
Step 2: Create the flower centers. Cut out small circles of paper, approximately 1 inch in diameter, to use as the flower centers. You can choose any color, but yellow is excellent for a classic sunflower look.
Step 3: Assemble the flowers. Glue the bottom edge of a petal and stack it on top of another, aligning the edges, then press down to secure. Repeat with additional petals to create the flower. Keep adding petals until your flower is complete.
.jpg)
Step 4: Add the center. Put glue on the back of your paper circle and place it in the center of the flower. Press down to stick it in place.
Step 5: Create the crown base. Take your green pipe cleaners and measure around your head. Add an extra inch to the measurement to ensure a comfortable fit. Cut two pieces of pipe cleaner to this length.
.jpg)
Step 6: Attach the flowers to the crown base. Take your completed flowers and attach them to the pipe cleaner base. Bend a pipe cleaner into a circle and twist the ends together. Wrap the bottom of each flower stem around the pipe cleaner circle and secure it with a bit of glue.
.jpg)
Step 7: Finishing touches. Add some final touches by filling any gaps in the crown with green paper leaves or flowers. You can also add some extra decorations, like glitter or beads, to give your height some sparkle.
There you go - now you have your own unique paper flower crown! Wear it to your next summer event and enjoy the warm weather with a beautiful accessory.
Additional Tips on How to Make a Paper Flower Crown for Summer
1. Try different types of paper, like patterns or textures, to give your flower crown a unique touch.
2. Try using a headband instead of pipe cleaners as the base for your flower crown!
3. To make your flower crown even more personalized, use different colors for each flower or add other decorations such as ribbon or feathers.
4. To make your flower crown more durable, use a clear spray adhesive to seal the paper petals and prevent them from tearing.
5. You can also make smaller versions of the paper flowers to create matching accessories such as earrings or necklaces.
6. Use recycled paper or materials such as newspapers or old book pages to make the flower crown more eco-friendly.
7. Using a watercolor brush, add shading to your paper flowers for a more realistic look.
8. Kid-friendly tip: Use safety scissors and non-toxic glue when making the flower crown with children.
9. You can make the flower crown as a group activity with friends or family and have a fun craft session together.
10. For a special event like a wedding or baby shower, choose paper and colors that match the theme to make a customized flower crown.
11. Add sparkle to your flower crown with glitter or metallic paint on the petals or crown base.
12. Try using tissue paper instead of colored paper to create a delicate and translucent look for your flower crown.
13. Use real flowers and foliage to create a more natural look by incorporating them into the paper flowers for your flower crown.
Consider these tips:
- Skill Level: Consider your crafting skills before creating a paper flower crown. This project is relatively simple but may require patience and precision.
- Design: Think about your paper flower crown's color scheme and layout. Mix and match colors and patterns or stick to a monochromatic look for your flower crown.
- Comfort: When making a paper flower crown, creating a comfortable base is essential. Ensure that your pipe cleaners or headbands are not too tight and fit securely on your head.
- Weather: Remember the weather conditions when wearing a paper flower crown. The paper may wilt or become damaged if it's hot and humid. You can use a clear spray adhesive to help protect the flowers and make them more durable.
- Occasion: Consider the occasion when you will wear the paper flower crown. For example, choose a more elegant and subtle design if you're attending a wedding.
- Time: Creating a paper flower crown can take time, so set aside enough time to complete the project. Consider creating a few extra flowers on hand in case of mistakes or filling in any gaps.
- Storage: Store your paper flower crown in a dry, cool place to keep it safe and long-lasting.
- Customization: Don't hesitate to get creative with your paper flower crown. You can add different decorations or embellishments to make it unique and personalized.
Creating a paper flower crown is a fun way to celebrate the summer season and add color to any outfit. Get creative and make a unique accessory that expresses your individual style.
This page may contain affiliate links. Your support through these links helps us create valuable content. Thank you!